


![BeFunky-collage]]] – 2026-06-19T170114.800](https://pausemag.co.uk/wp-content/uploads/2026/06/BeFunky-collage-2026-06-19T170114.800-600x403.jpg)


![BeFunky-collage]]] – 2026-06-03T215133.336](https://pausemag.co.uk/wp-content/uploads/2026/06/BeFunky-collage-2026-06-03T215133.336-600x403.jpg)


Before now, you’ve probably always fixed torn leather and fabric by sewing it. But what if you’re in a hurry? It’s possible to use strong adhesives instead of wasting time with a sewing needle. Some of these adhesives are so firm that it’s impossible to separate the pieces without ripping them. In this article, you’ll learn how to apply these glues safely and correctly.
What to do before fixing fraying and holes with glue?
Before you apply glue to your damaged fabric, there are specific procedures you must observe to ensure that the adhesive creates a permanent bond.
Take these steps to prepare your damaged surface to fix fraying or holes with some leather glue:
- Ensure that your workspace is well-ventilated. Loctite recommends glue application at temperatures between 4-40 C.
- Cover up any tables or chairs near you to protect them from glue spills.
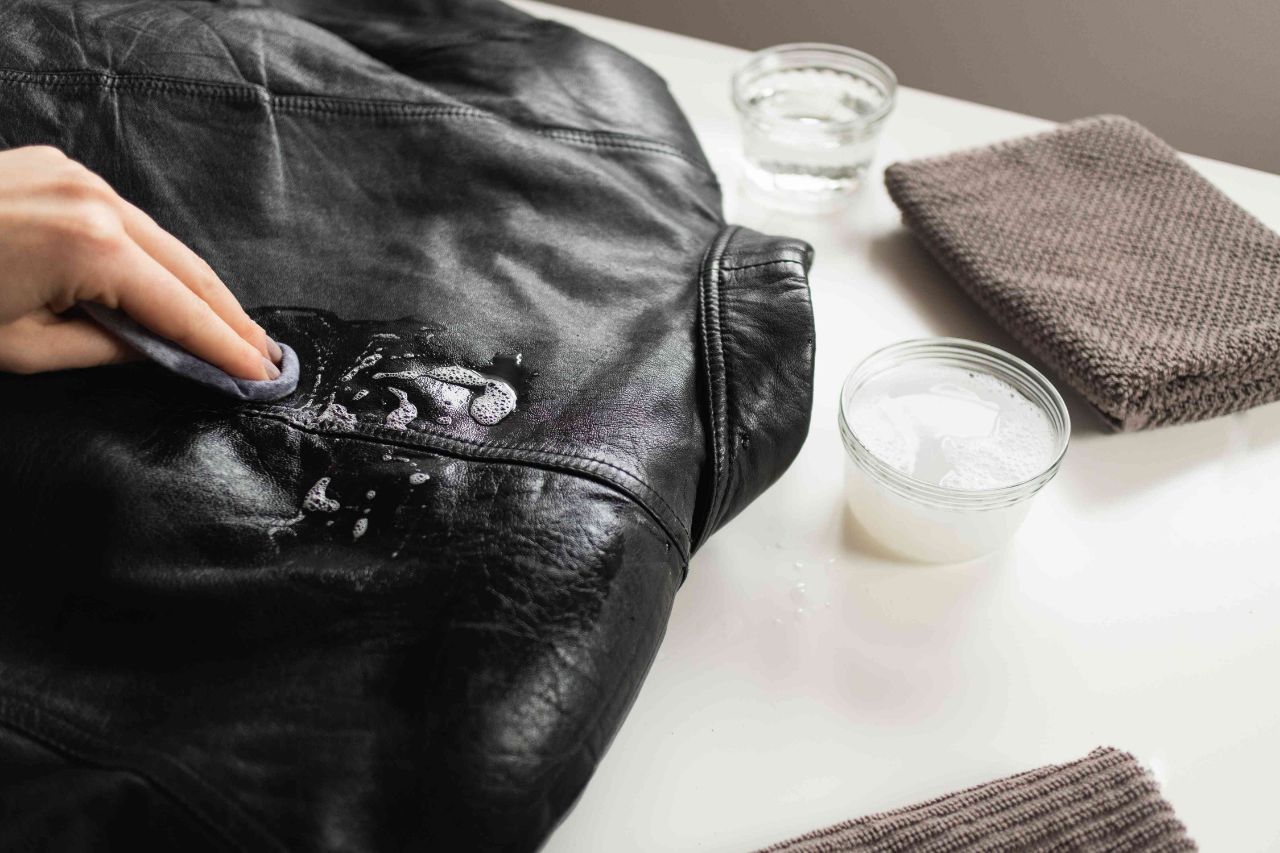
- Clean off dirt or any other particles that might prevent a strong seal. If the damaged material is leather, you can use a damp rag and pastille soap to wash it.
- Wear rubber gloves and get your tools ready before you start.
How to fix leather with glue
Depending on the type of adhesive you are using to fix your damaged leather, your application method may differ. Here’s a list of suitable glues for leather and how to use them:
Leathercraft cement
The leathercraft cement is one of the strongest leather glues available. Once you apply this glue to your torn leather material, you don’t have to sew it anymore. You may never be able to pull apart the joined leather materials without tearing them.
Fixing leather with leathercraft cement
- When applying leathercraft cement, you must put some glue on both pieces. This will ensure smooth adhesion
- Next, hold the joint leather pieces with a clamp.
- Set the glue with a hand rougher.
- Then, smooth the glued surface with a metal roller and let it dry. Leathercraft cement takes between 12-24 hours to dry.
Gorilla Glue
Most Gorilla Glues tend to have a fairly permanent bond. That said, they may only last for a few months. If you need to fix a hole in your leather material and have no other adhesives around you, you can use Gorilla Glue. Still, you should know that you may have to apply a new spread of bond on the joint pieces in a short while.
Fixing leather with Gorilla Glue
Here’s how to mend leather with Gorilla Glue:
- Wet one surface with a damp rag.
- Apply and spread the glue on the damp surface.
- Then, place the glued material over a hole to cover it up.
- Use a clamp to hold the glued materials for about 10–20 seconds.
- Remove the clamps and leave the adhesive for about 24 hours to help it cure completely.
Fixing different fabrics with glue
Different fabrics require varying application procedures. For instance, repairing torn jeans with glue may involve different steps than fixing a ripped cloth. Let’s explore how to use fabric glue on different materials:
Torn jeans
Follow this guide to apply glue to your jeans:
- Turn your jeans inside out and place cardboard behind the hole. You may also use masking tape to hold the cardboard to the jeans.
- Outline the area where you want to apply the glue with a tailor’s chalk.
- Coat the outlined area around the hole and the jean patch you want to use with fabric glue. It’s best to use a fan. brush to apply the adhesive. This is because the fan brush is less likely to leave fibres on the fabric
- Now, cover the hole with the glued jean patch.
Regular fabrics
Here’s how to fix regular cotton or loose fabrics:
- Follow the same first instructions as with jeans; turning the garment insideout and making a patch out of a similar fabric
- Squeeze small quantities of fabric glue on the torn part of the cloth. Then, place the patch you’ve cut out over the hole
- Use clamps to hold the materials in place and allow the glue to dry.